Wildermyth
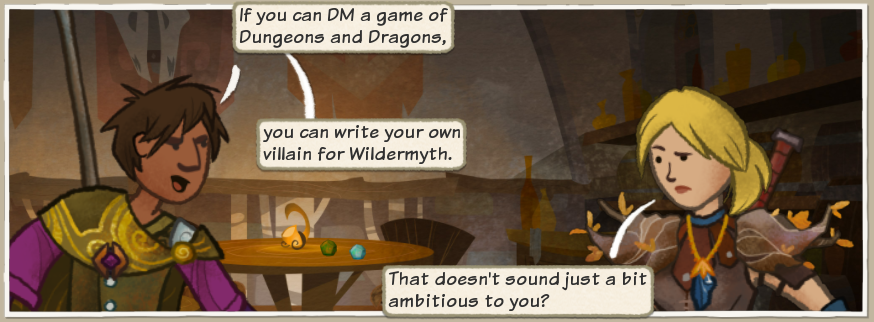
How To: Write your own Villain for Wildermyth - Part 2
How to: Write your own Villain for Wildermyth - Part 2
This is part 2 of a series where I'll teach you how to write and implement your own "main story" for Wildermyth.
(Note - if you completed Part 1 in an earlier patch, you might need to run through those steps again, since the tool chain has improved and the data structure has changed a bit. This stuff will stabilize over time! Contact me if you need help.)
Wildermyth is a mythmaking tactical RPG currently in beta. Our philosophy is to put as much storytelling power into your hands as possible, and part of that is exposing our tools so that you can craft your own stories inside the game.
That's our goal, anyway. The tools I'm going to show you today are under active development, but they work right now and they're only getting better. Some of this stuff is documented on the wiki, and some needs to be. If you decide to give this a shot, find me on Discord. We have a tools-and-modding channel just for this, and I'll be thrilled to answer your questions and help however I can.
How To: Create a Custom Fight in Wildermyth
You'll Need:
* Wildermyth Beta - get it here[https://wildermyth.itch.io/wildermyth].
* Java (64 bit) in order to run the dev tools
Step 1: make a plan
For this article I'll be continuing to work on the Heart of the Forest campaign I sketched out in Part 1. Here's the outline again:
- Introduction
- Intro Event: a rumor reaches town of strange beasts in the woods. Three friends decide to investigate.
- Fight: You find a shrine, and you're attacked by Thrixl. You learn they've been disrupting shrines.
- Chapter 1
- Goal: Clear all hostile sites to unlock chapter one boss
- Fight: A forest guardian is slain, but you kill the thrixl responsible.
- Interval ~10 years pass
- Chapter 2
- Omen: the woods are growing wilder and more angry, and the thrixl have returned in greater force. The heartseed has been stolen from the fallen guardian.
- Goal: Track the thrixl to a poisoned stream. Fight: The seed has been corrupted and planted at the source of the stream, poisoning the water. Kill thrixl and corrupted guardians. Victory: Over time the forest heals, yay!
We'll be working on the first fight, where the heroes are scouting in the woods and find a shrine desecrated by some weird creatures. Here's a little sketch of how I think I want the map to look:

For this fight, I want the heroes to approach the shrine in the center, and then get ambushed by Thrixl from the two sides. We'll create three comics, an arriveAtSite to set the scene, a midMission event to announce the ambush, and a victory to wrap it up.
Step 2: Create a New (Basic) Fight
Run scratchpad, go to Site Lab.
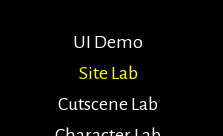
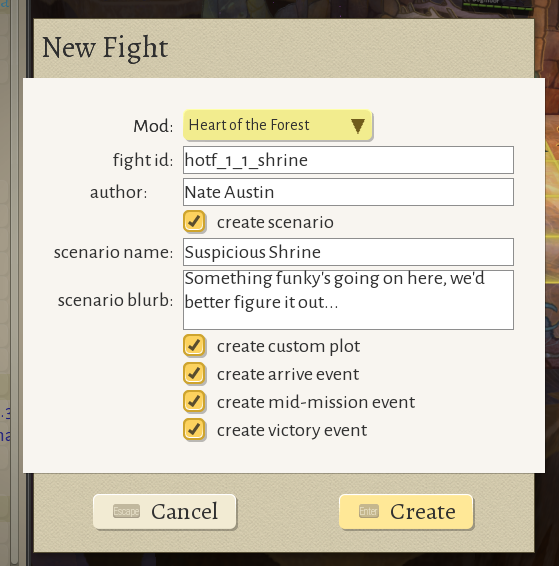
This is where we'll be spending most of our time. Site Lab is all about previewing and editing combat maps. Find the New Fight button in the upper-right hand corner.
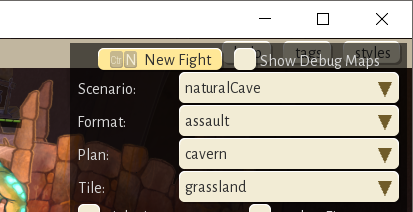
And press it! Fill it in something like this. Keep all the checkboxes checked! They'll save us some legwork.
Go for it.
So, that created a whole bunch of stuff, here's the breakdown:
Mission Map: This is the map itself, it's always created, and it defines the terrain, visuals, and where to sprinkle random scenery, as well as defining spawn points and stuff for the plot to use. You can view the map in SiteLab.
Scenario: This is how we will test drive the fight from the main menu, without having to embed it into a campaign. You can take a look in the Scenarios Editor (Content Editor, Control+4)
Plot: The plot controls how the fight is run, when things spawn, what the objectives are, and little things like defeat and victory. You can view it in the PlotView but normally we'll work on it in SiteLab where it's displayed right below the Mission Plan.
Arrive Event: This is a comic event that can be called from the campaign, that will kick off this fight. You can view it in the Comics tab or Effects tab.
Mid-Mission Event: If we want something to happen in the middle of the mission, like an ambush, a discovery, whatever, it's fun to have the heroes talk about it with a mid mission event. It's optional but we'll be using it here.
Victory Event: The comic that will be played on victory. We generally don't bother making defeat comics, to be honest, but you can if you want mission defeat to be a viable story path. Usually it makes more sense to end the game if the player wipes on a plot mission.
Step 3: Test it
This fight should actually work, just as it is, so let's take a look! To convince the game to show you the dev tools, you'll need to add a file called devMode.txt to your install folder, like this:
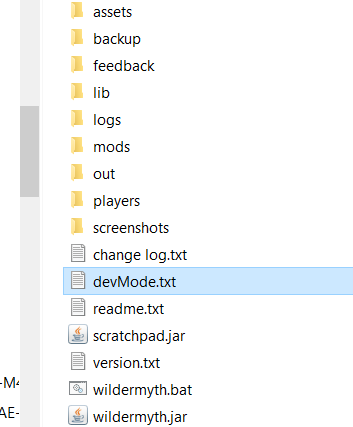
There doesn't have to be anything in the file, the name is all that matters. Now when you launch the game you should see an option called "New Battle." This is how we're gonna test our fight.
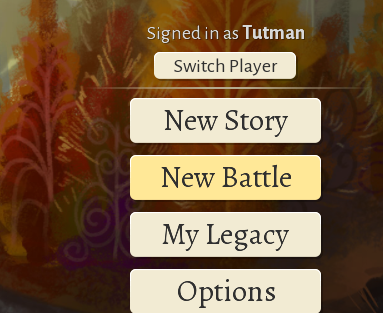
Find it in the list...
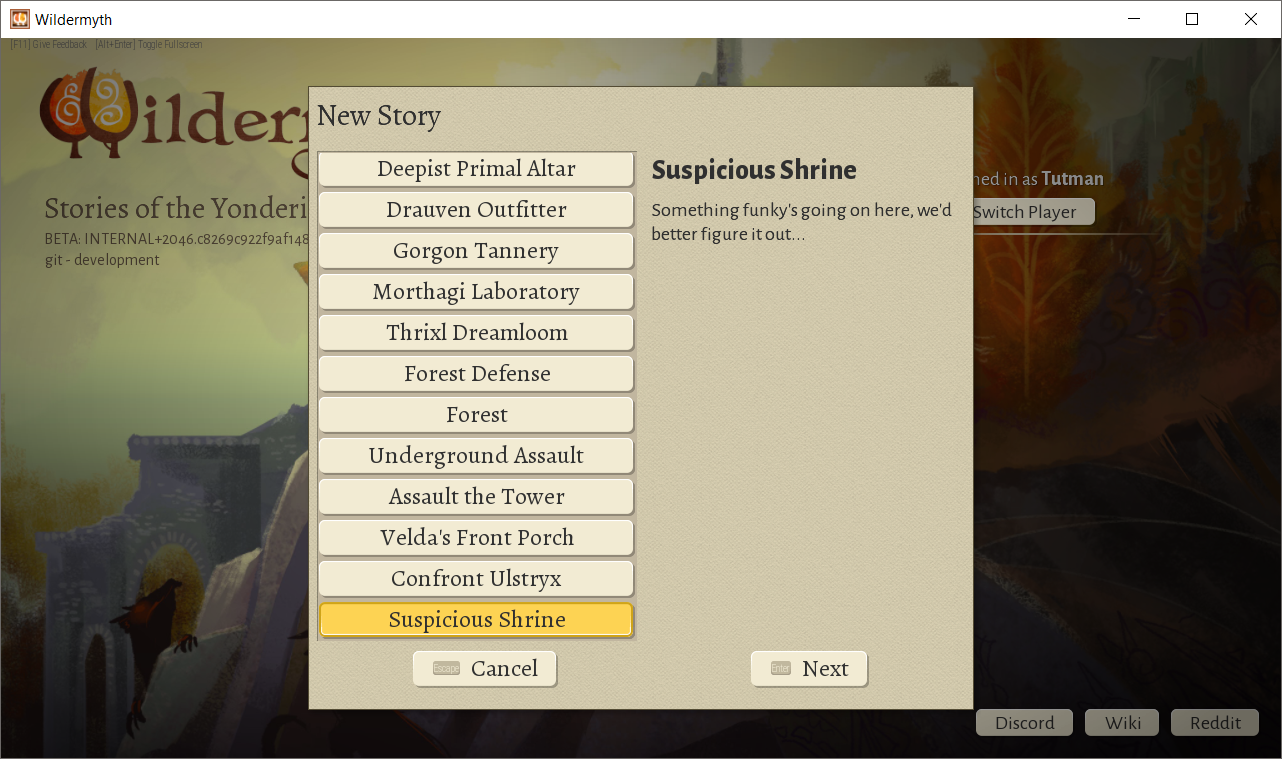
You should see the mid mission event play, and then the fight will start. The default roster is just one farmer, who probably definitely won't win this fight, so... When you're done let's head back to scratchpad and make some changes! (Note - the Arrive event is not played when using the Battle menu, but it will be useful when we integrate our fight into the campaign later.)
Step 4: Edit the Map
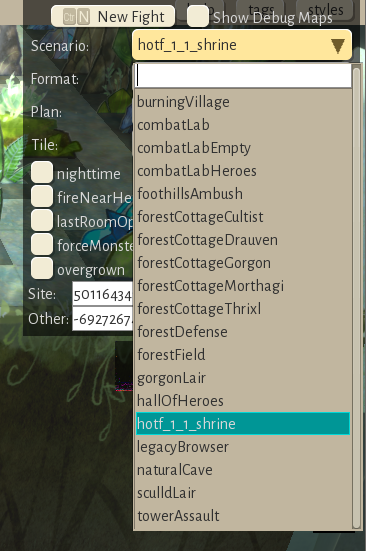
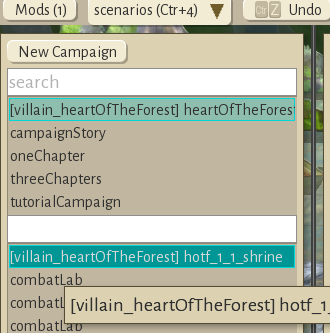
Head back over to Site Lab, and use the Scenario dropdown in the upper right to find our map, like so:
Ok now this is the fun part! But Also I'm gonna be honest with you: this tool is maybe not what you were expecting.
So yeah. The way it works is, there's a grid of text that controls the individual tiles. Here's the (default) meanings of the characters:
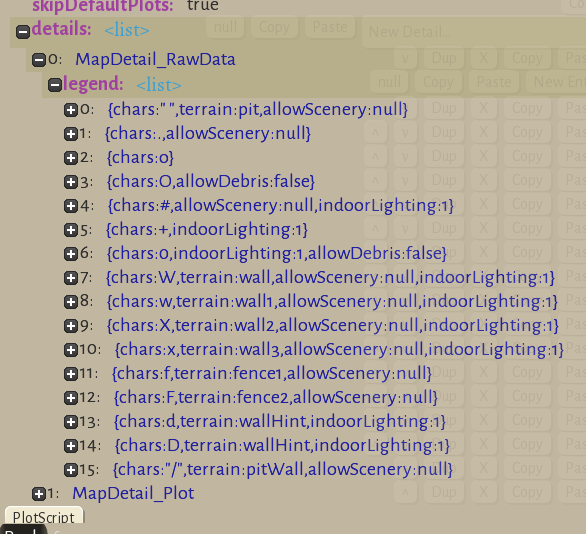
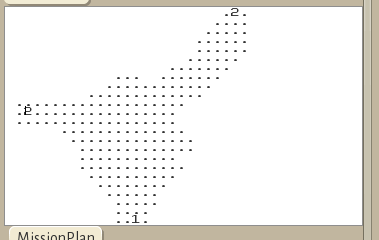
Characters _not_ on this list can be used for spawn points or other purposes, as we'll see in a bit. Based on my sketch from earlier, I'm going to enter some data. I want the heroes to spawn at the bottom, so I'll put the '1' there, and I want the monsters to spawn in on the wings, so I'll put a '2' at each wing, like so:
(You can press New Seeds over on the right (Control+R) to see what it looks like and adjust as you go.)
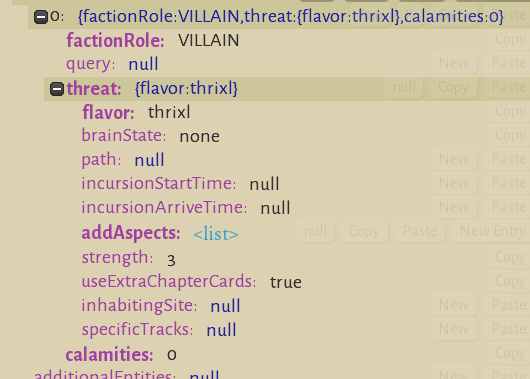
Let's take a moment to fix the other problems with our fight - the monsters are the wrong group, and there's only one farmer on our side. Head over to the Scenarios tab (Control+4) and find our scenario in the second list:
We'll set the foe to Thrixl instead of Gorgons (Inhabitants -> 0 -> threat -> flavor), and we'll set calamities to 0 there as well.
Then expand the scenarioInfo at the top and define a roster for the scenario, like we did in part 1 for the campaign:
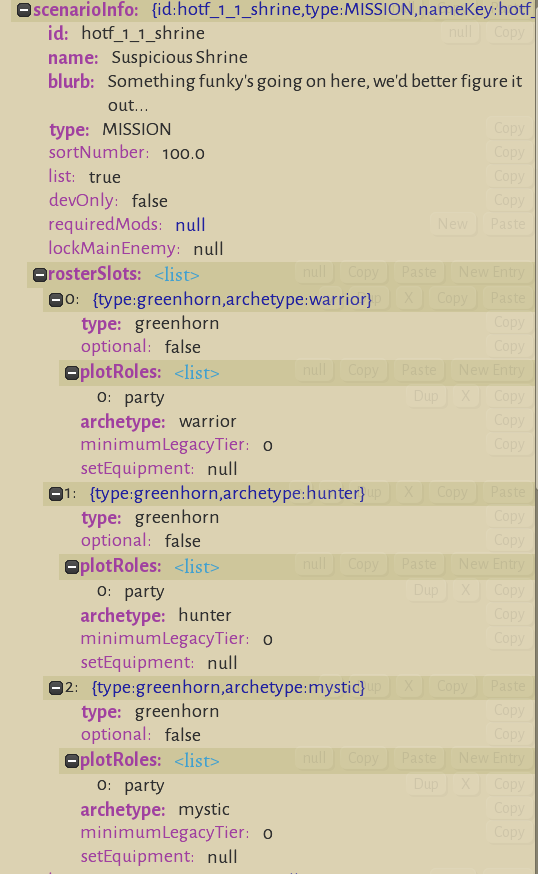
Save your changes (Control+S), and then head back to the Map view (Control+8) and refresh the map (New Seeds -> Control+R). If you don't save the scenario, the map view might not pick up your changes. Now you should see a warrior, hunter, and mystic, and thrixl spawning in the corners. Great!
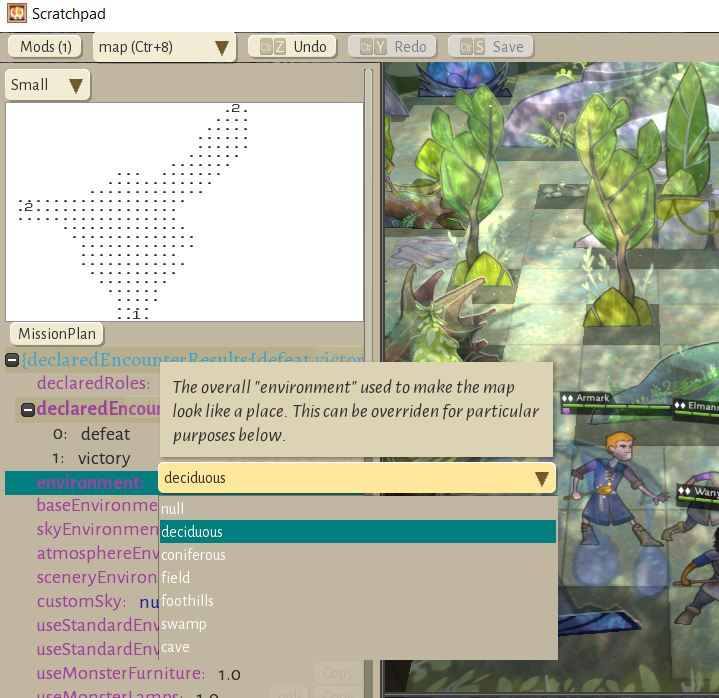
Let's also set the biome to the forest, by setting the environment, like so:
Now, I want a focal point in the middle that they have to approach, and I also want to clear away some of the excess furniture, so I'll put some more marks on the map, like so:
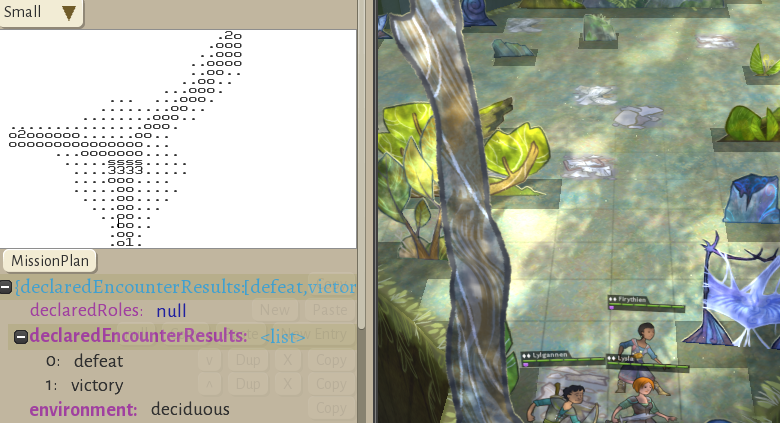
The lowercase 'o' character just means "don't put scenery here," and you can find it in the legend to make sure. The 'ssss' is where we want the shrine to be, and the '3' is where we want the heroes to approach to investigate. You don't have to use 's' or '3', just check the legend, and use the same character in the next step, where we tell the map what to do with those locations.
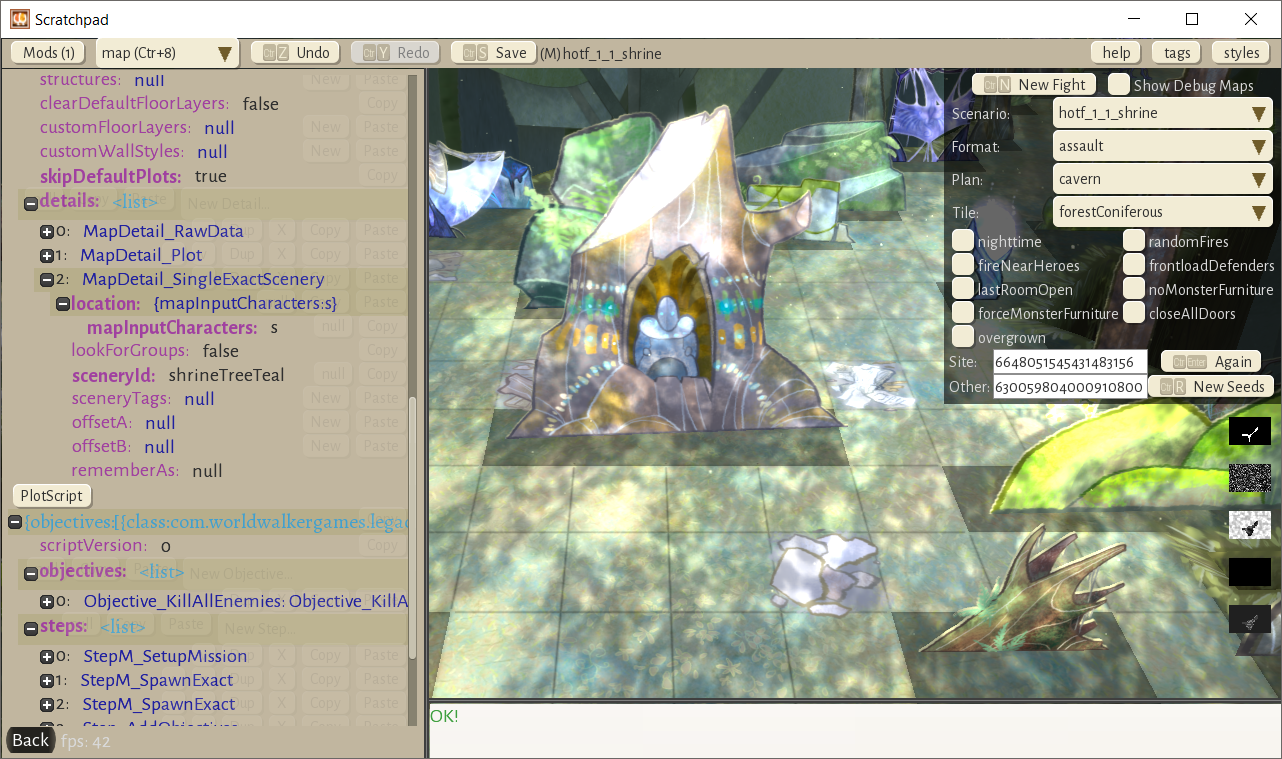
First let's define the focal point. We'll create a piece of scenery where the ssss is, by adding a Map Detail. Click the New Detail button and choose **MapDetail_SingleExactScenery.**

for the location select New... TilesFromMap and set the mapInputCharacters to "s" (because we put some ssss on the map where we want the shrine to appear.) For the sceneryId, enter "shrineTreeTeal". (You can browse the sceneries in SceneryLab to learn what your other options are.) That should get your shrine spawning:
Hot! For my maps, I like to go a bit further, messing around with floor layers to create the impression of a path on the forest floor. You can see how this is done if you load some of the Ulstryx maps and poke around, there's a variety of different techniques available for map crafting. But for now let's get back to making it functional.
Step 5: Create an ambush
We want the mission to start out without any monsters, to give the player a chance to look around and get spooked out a bit. Then, once the player approaches the shrine, we want to play the midMission comic and spawn the monsters! To do that, we're going to add an objective to step in a certain region, and tell the plot to wait until that objective is complete, before playing the comic, etc..
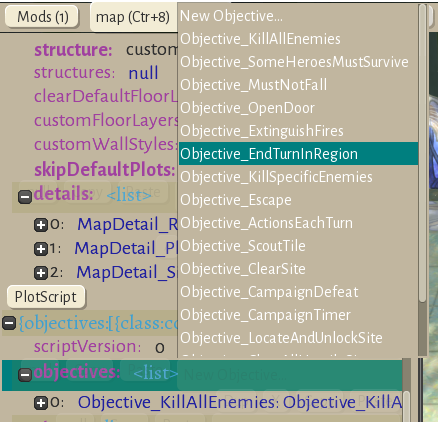
Scroll down to the "Plot" section, and we'll add new Objective called Objective_EndTurnInRegion
Set the "region" to TilesFromMap and set the mapInputCharacters to "3" because we put some 3333 on the map for where we want the player to approach to investigate.
Now we need to add the objective, and we want to wait for it to complete before firing the event and spawning the monsters. We can do all of this by adding a new step, Step_WaitForObjectives. Add the "endTurnInRegion" objective to the list to wait for, and move the step upward so that it's just after Spawn Heroes. Make the mid mission event next, and the monster spawn after that, and leave the AddObjectives step last. Your plot should look like this:
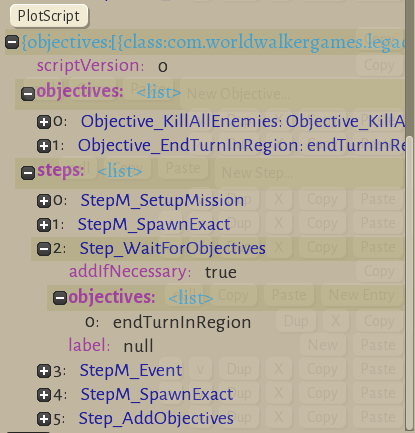
Because steps operate in-order, the mission should go like this: set up, spawn the heroes, then wait for the heroes to approach the shrine. When they do, show a comic. Then spawn the monsters, and lastly, add an objective to kill them all. If the heroes succeed, play the victory event. Feel free to give it a spin in-game!
Step 6: write the comics
Let's hop over to to comics view and embellish our stories a bit. I'm going to move fast here because making comics isn't the point of this article, but you can read more about it here on the wiki.[https://wildermyth.com/wiki/index.php?title=Comic_Editor_Reference]
I'll do a quick little arrive:
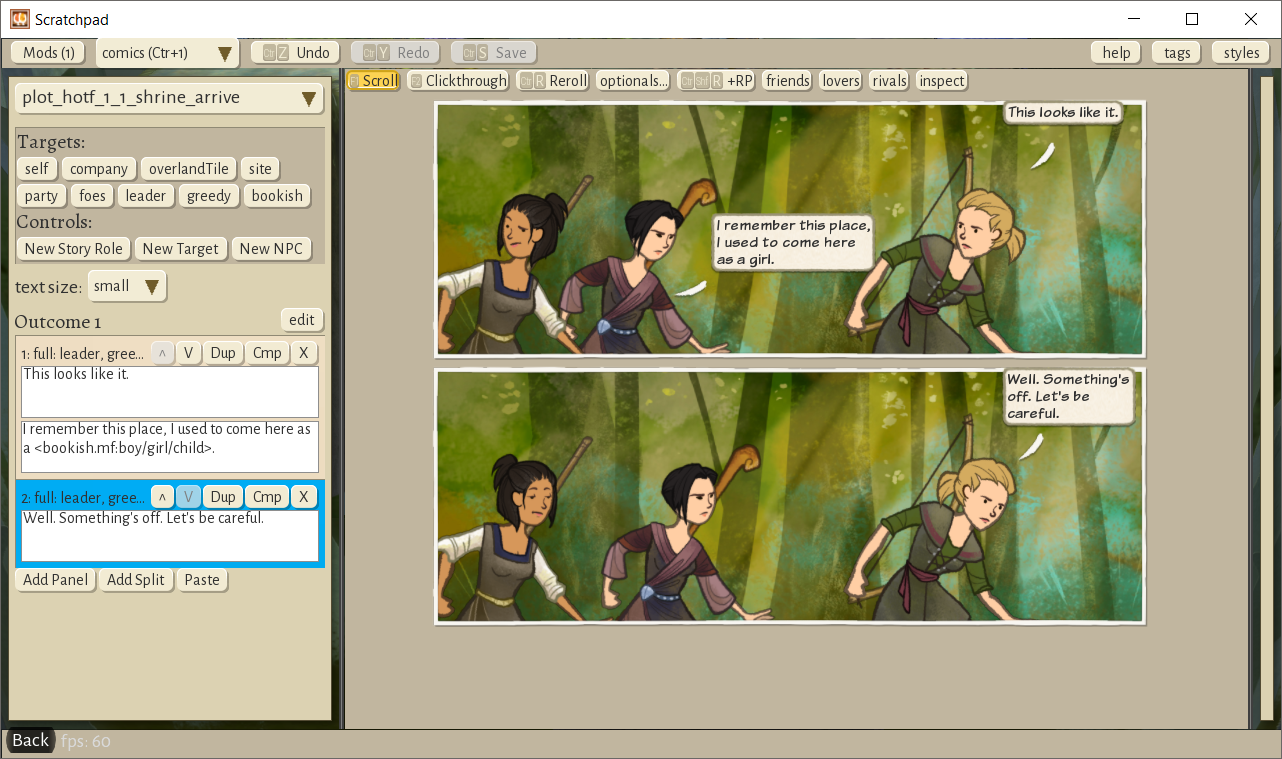
And a scene at the shrine:

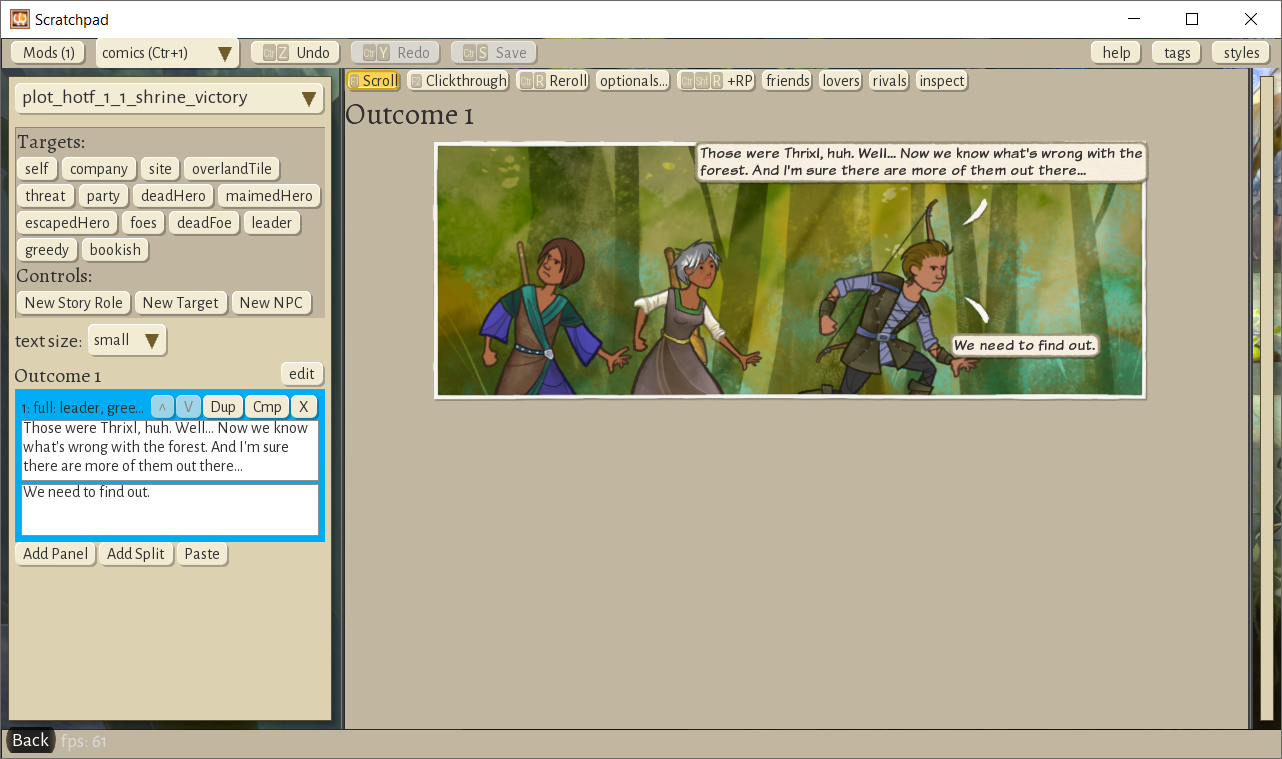
And a victory scene:
One thing about the victory is, because any of the heroes might die in the fight, you might want to make most of the roles optional, or write a separate fallback event with fewer required roles, if you prefer. It shouldn't break the game if you don't, but it's nice to have stories that react to the actual in-game situation.
Step 7: hook it up
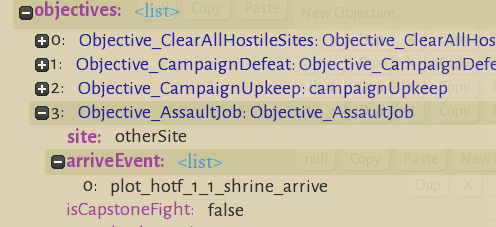
Now let's integrate our fight into the larger "Heart of the Forest" campaign we started in Part 1. In the Plots view (Control+0), find C_heartOfTheForest, and add a new Objective, Objective_AssaultJob.
Set the site to "otherSite", and set the arriveEvent to the arrive event we generated, something like "plot_hotf_1_1_shrine_arrive".
(If you're wondering where otherSite came from, check the MapConfig for chapter 0 to see how it's specified. You can specify whatever sites you want that way, and give them whatever roles you like.)
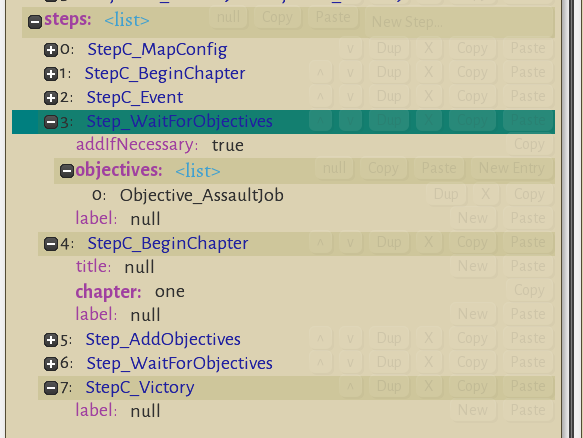
Then, create a Step_WaitForObjectives to wait for the Assault. Put it right before the start of chapter 1, like so:
Step 8: play your story!
Scout the tile, and assault it. You should see your Arrive event:
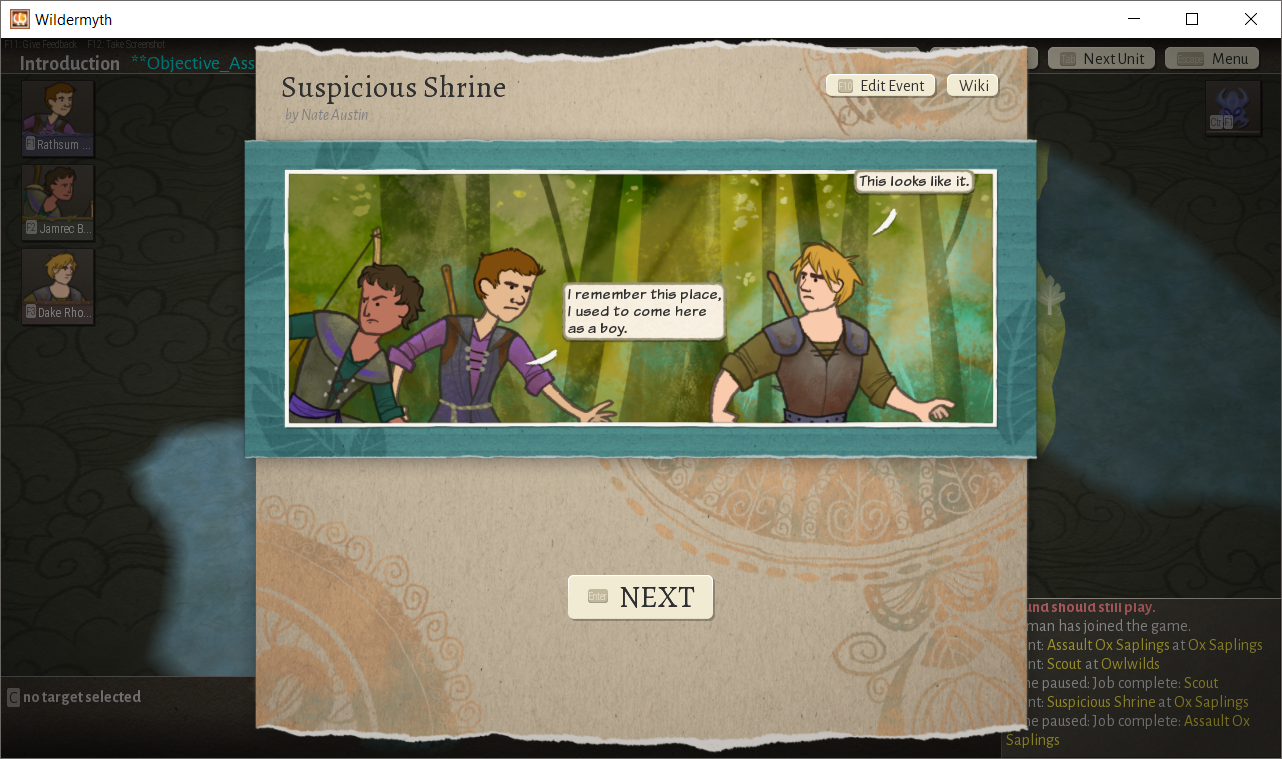
It worked!
So, now we've got a custom fight in our campaign, and honestly, stringing together custom fights is most of the work that goes into a villain (aside from writing comics, of course!) These are the core tools we use to build game content. Maybe next time we'll talk about building your own monster, or we can go into more depth on another topic if I get feedback in that direction. Thanks, and happy writing!
Leave a comment
Log in with itch.io to leave a comment.